In this post I’ll be covering the replacement of stock cooling in an HPE ML350p Gen8 with a much quieter solution. The stock coolers are rather loud putting out ~45db at idle. These will be replaced with two 120mm CPU fans on heatsink towers and two 90mm case fans all rated a 0.3 sone. The framework for this guide comes from Jonas W’s post on Serve the Home. The original unit discuss is an HP ML350e and I wanted to document the differences.
System Specs:
Dual Xeon 2620 CPU’s
144GB DDR3 RAM 2 1333Mhz
Nvidia Grid K2 Computational GPU
AMD W7000 Display GPU
Dual Samsung EVO 2TB SSD in Raid1
Dual Hpe 985GB SAS @ 7200RPM in Raid1
Parts:
2 – Arctic F8 PWM PST Low Noise fan
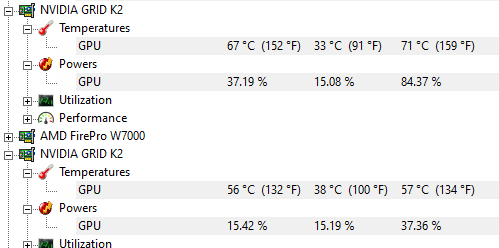
Let’s look at some before info really quick:
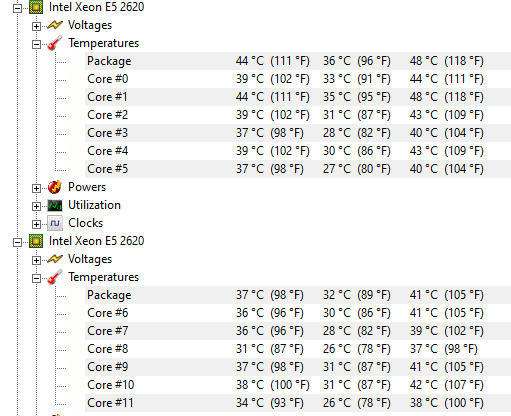
Under full load we see our CPU temps maxing out around 67C for CPU0. As it is at the back of the case and is currently cooled by the passive heatsink this seems reasonable. We will use this metric as the desired high watermark post modifications.
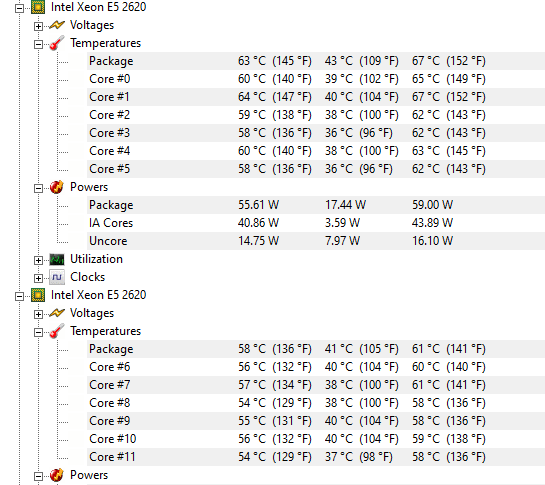
Loading up the GPU’s we see are mark is 71C. This system cooling design is obviously performing fantastically. Too bad it is unbearable to even be in the same room while these load runs are happening.
Let the Work Begin:
In order to make this mod reversible I plan on using the stock fan connectors and housing and modifying the case components a little as possible.
We start by pulling the four stock fans out of the fan cage. Then on each fan remove the red bracket to gain access to the grey connector.
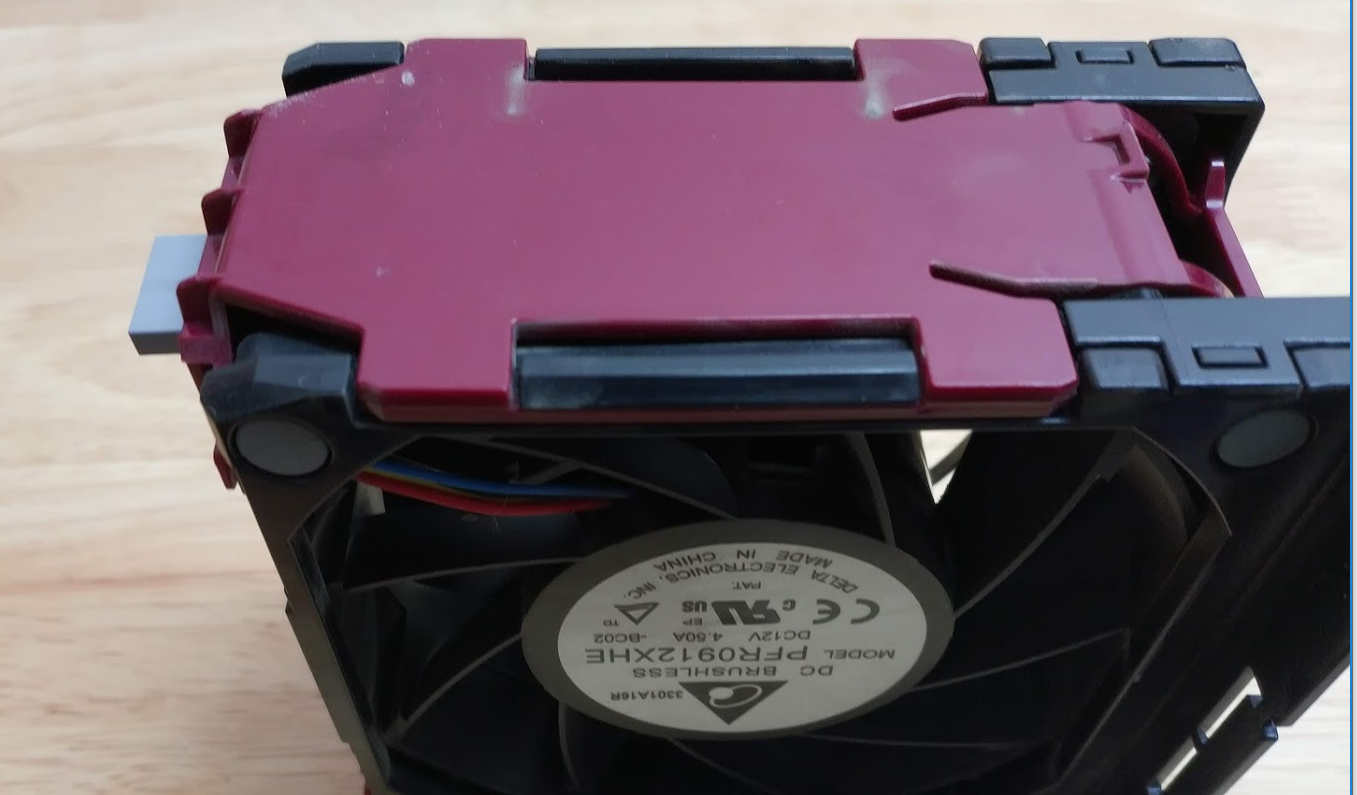
We are going to cut all four wires as close to the fan as possible. Ensuring that you cut after the merge of the two black wires.
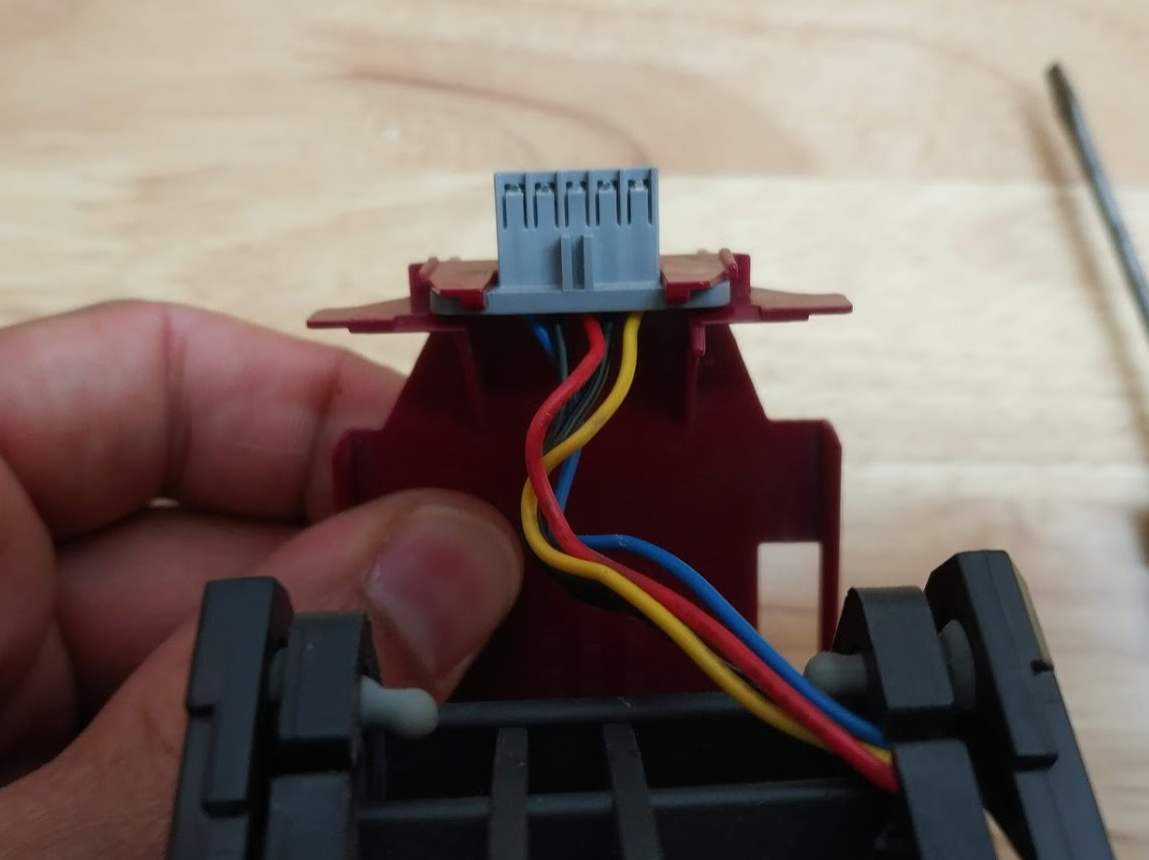
Strip the ends of all but the blue wire on this fan terminal.
We then need to cut the fan extension cables we purchased in half and strip the female sides ends.
If your cables are not color coded here is the fan cabling pinout:
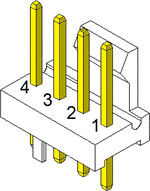
On the HPE stock fan side merge all BLACK and YELLOW wires <-> This will connect to the BLACK pin1 on the extension side.
HPE stock fan RED <-> YELLOW pin2 on extension
NOTE: The blue wire controls fan speed (PWM). I left mine off as I want the fans to run at full speed always. If you want system fan control do the following.
HPE stock fan BLUE <-> Extension BLUE pin4 on extension
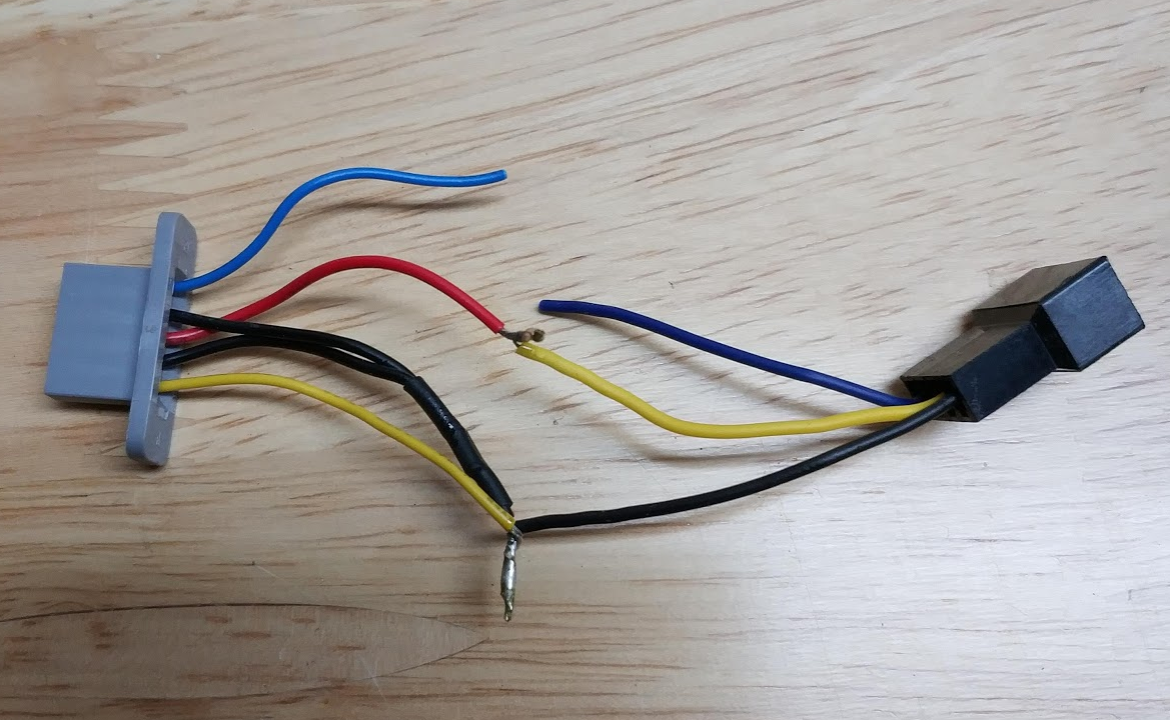
Solder everything together, shrink tub the whole bundle and you have four ready-made fan adapters.
Now would be a good time to test your new cables. If you plug them into the empty slots in the fan cage and boot the system it should identify all four fans and “think” they are running at 100%.
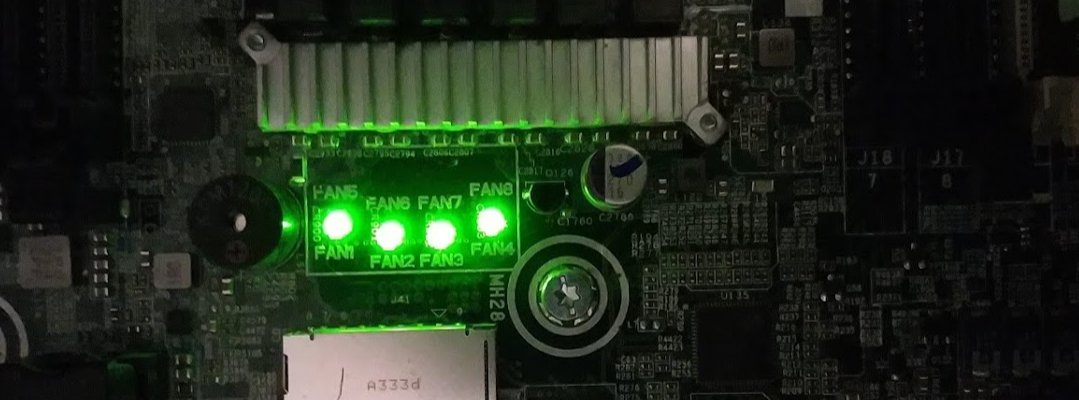
I found through trial and error that the system needed to post three full times to fully assess the fan module. I would suggest you let the system post three complete cycles to validate your wiring.
On to the fan install:
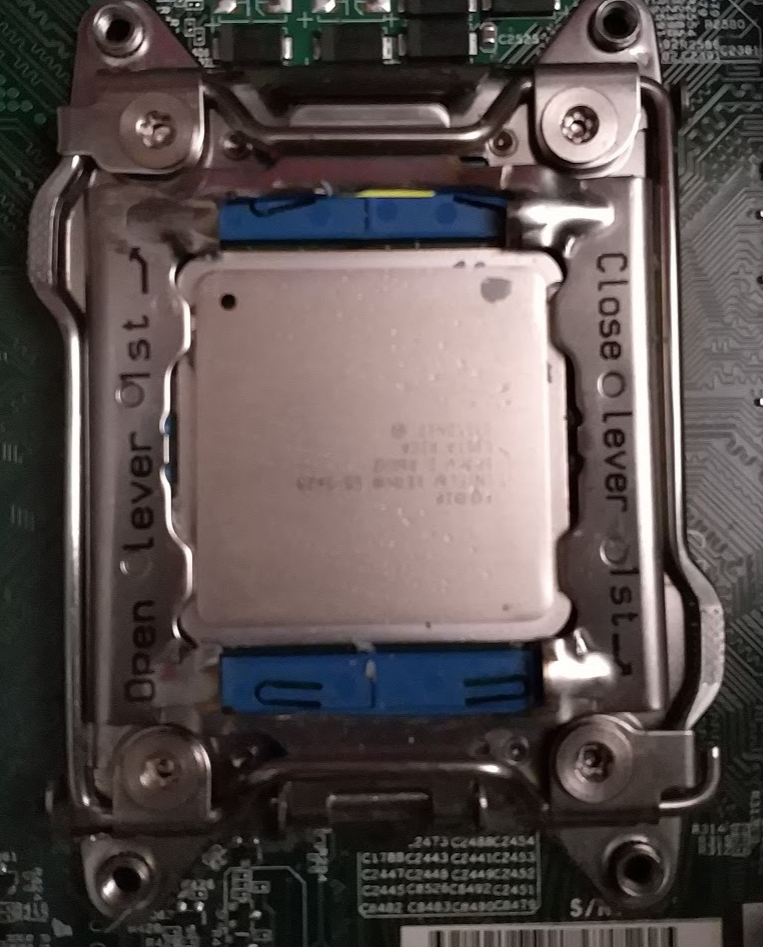
As with JonasW’s install the cpu brackets were too large for the cooler to be installed properly. Rather then remove the bracket all together I decided to use a Dremel and cut out the raised areas. I see no impact to the sturdiness of the bracket.
Heavy lifting done we install the case and cpu coolers. I had to use the stock heatsink screws with the new cpu coolers as the thread pattern was different. The case fans I mounted to the fan cage and remove (unscrewed) the extended pcie card support panel for better air flow.

Post Modification Info:
Post mod our CPU idle temp looked so good I thought my monitoring app was lying to me.
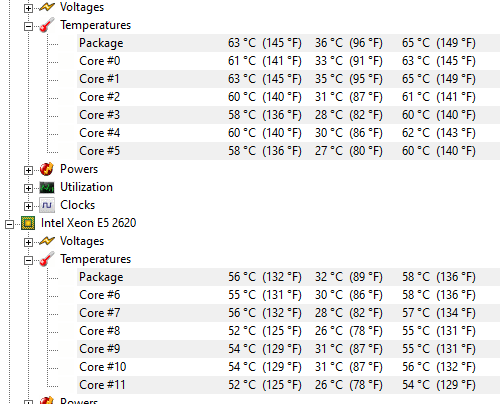
I started doing some load testing and things still looked acceptable. Better then our 67C target actually! This is a 6 hour sustained render at 100% CPU load.
When I first start GPU load testing I actually had a thermal shutdown occur. I built a makeshift baffle to guide the air through the NVIDIA card as it is passively cooled. This solved the thermal shutdown but the card is running at max temps currently.
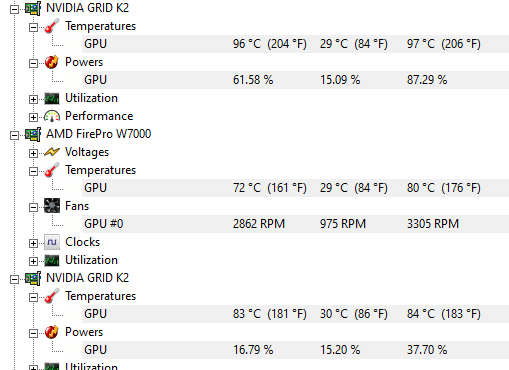
After a 4 hour sustained GPU burn in I have no issue but I plan on figuring out a way to get more air through this card.